Exit solution: vector
Installation
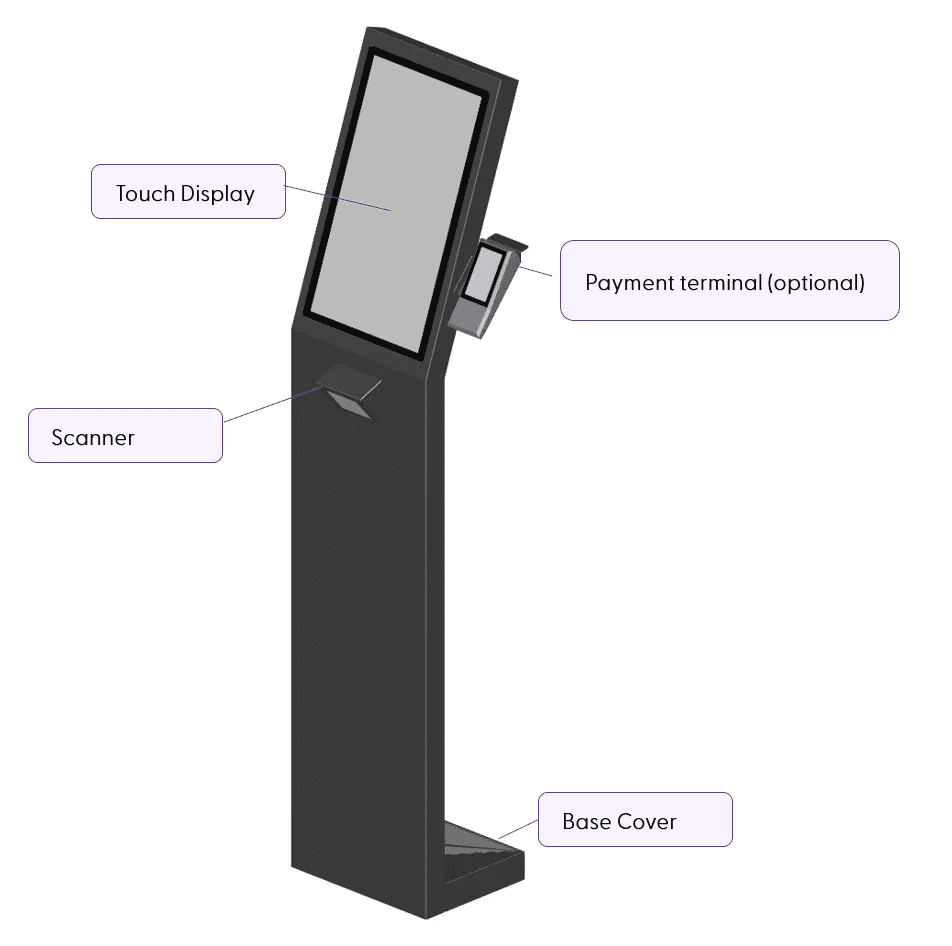
Overview
The vector is generally assembled as follows:
Unpacking the shopreme vector
Open the packaging and carefully remove the cardboard box, as well as all packaging and protective films around the individual components and accessories. Verify that the delivery is complete (the scope of delivery is specified in the shipping documents).
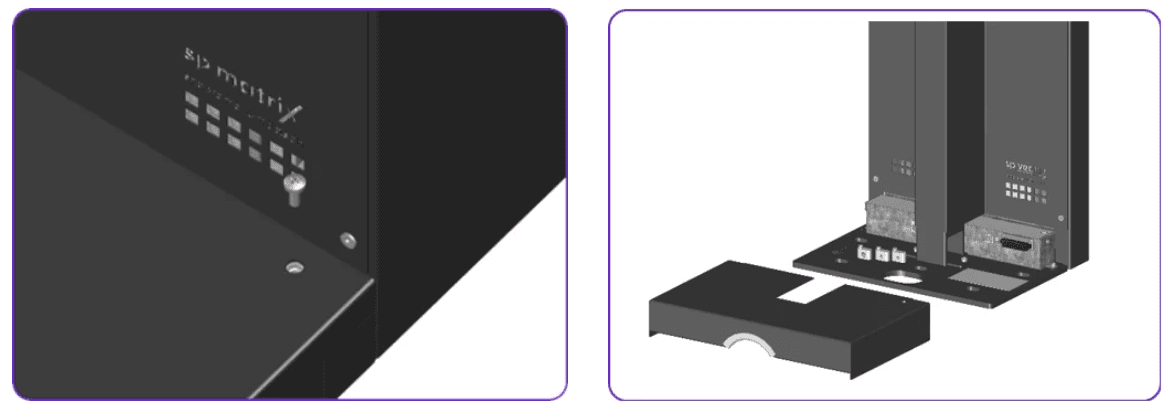
Removing the base cover
Before removing the base cover, make sure to unlock the screw with a Phillips screwdriver. Then, proceed to remove the magnetic base cover. Please be aware that this may require some force.
Mounting the vector
Note: This section can be skipped if you ordered a vector with an included base plate.
To mount the vector, it is necessary to anchor it firmly to the ground. This anchoring consists fastening points on the base plate, which require the provided flush anchors, screws and washers (M10).

Network information
Check the diagram on the main Network & Infrastructure page.
Installing the vector and payment terminal
There are two options for installing or cabling the shopreme vector.
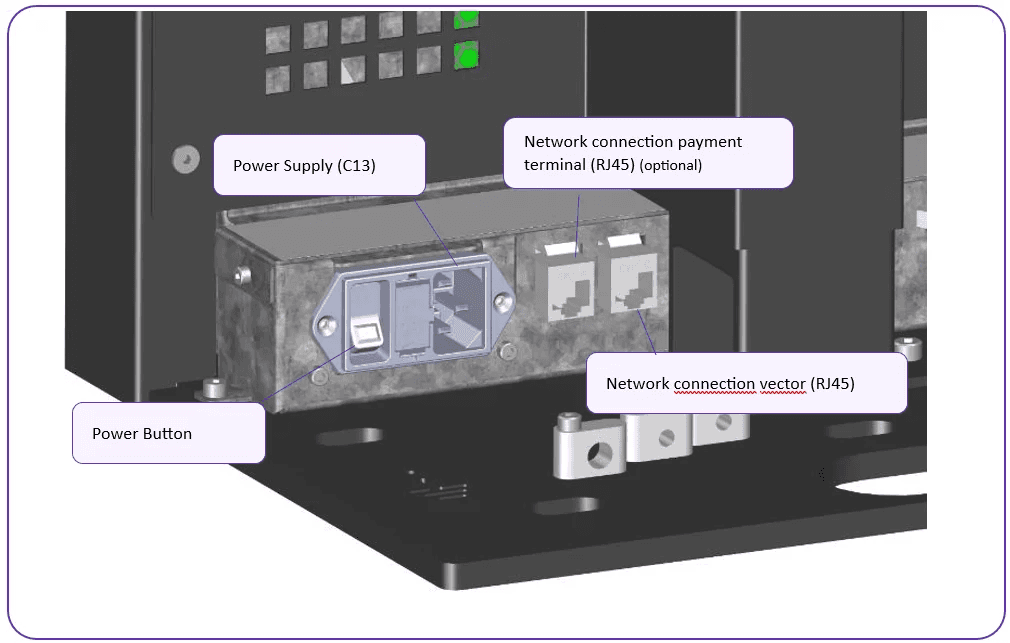
Cabling via cold-device plug
The vector is a plug-and-play device. The power supply is either via a cold-device plug or using power over ethernet, and it has two Ethernet ports. One of these two ports is used to operate the payment terminal. To connect the vector, it is required to have:
Power supply (C13) – Optional: Only if you have decided for that power supply
Network connection for the payment terminal (RJ45)
Network connection for the vector (RJ45)
Connect the cables to the vector and secure them with the designated strain reliefs.
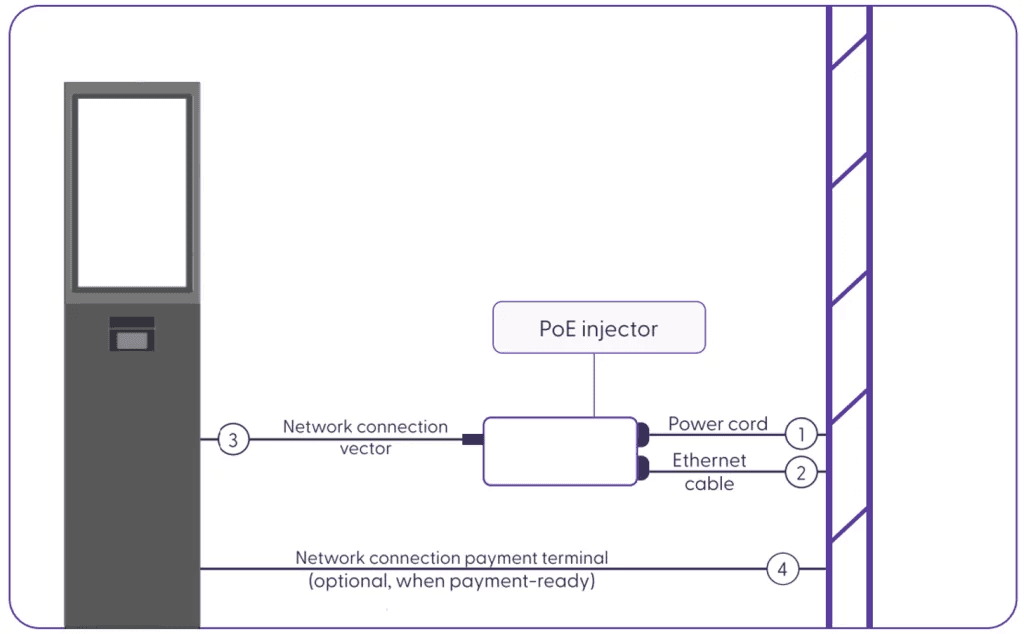
Cabling with the PoE (Power over Ethernet) injector
The power supply is handled through Power over Ethernet (PoE). You need two or three Ethernet cables PJ45 CAT6 (depending on whether you need a payment terminal for the shopreme vector device).
Connect a power cord to the socket and to the PoE injector.
Connect an Ethernet cable to the Ethernet socket and to the PoE injector (LAN).
Connect an Ethernet cable to the PoE injector (PoE) and to the vector.
Connect an Ethernet cable to the Ethernet socket and to the vector (EFT).
Cabling the gate (Optional)
We offer two options for connecting the gate to the shopreme vector: On the ground or via the customer guidance system, if available.

Finalizing the setup
Attach the base cover and screw it back. Once all connections are ready, the vector will switch on automatically, and you can start the Hardware Setup.
Testing the gate
During the hardware setup, it is checked whether the gate is working. Alternatively, the opening of the gate can also be tested via the settings of the vector. Visit the section on Settings and Configuration for more information.

shopreme © 2025